Showing posts with label fabric. Show all posts

Sunday, January 11, 2015

Cabin Couture: Michael Miller Challenge

I am writing this post from a hotel room in Tennessee. This trip is for work and it is pretty standard archaeology stuff... so I am tired physically and mentally. I thought I would use this hotel room time to catch up on some of my finishes that I have not blogged about. 

Welcome to Cabin Couture. 


I made this baby quilt for the Modern Quilt Guild's Michael Miller fabric challenge. The deal is, you sign up and they send you fat eighths of fabric. Then you make a quilt and you submit it to the judges. 


I am going to be real here, I did not love the pastel colors all together. I could not get inspired. We were supposed to use only cotton couture solids on the front. I loved the hand of the cotton couture. It is so soft. But I could not picture myself spending money on more of these colors I did not love.

So I got together some colors I did love and pulled out the pastels I loved. This combination was inspired by sunrises and warm days. I was trying to think about vintage quilts faded from years of use. 


I was inspired by traditional historic quilts. Simple and eye catching with clean lines. I want to make a really big one now....


The quilting is equally simple. These fabrics are so soft! This is a dreamy baby sized quilt.


It wasn't selected as a challenge finalist so it will go to a baby who will love it very soon, which is the perfect place for a quilt to go. I am pretty excited to hand this one off to a new baby! 

Quilt Stats: 
Quilt Name: Cabin Couture
Size: 40"x 40"
Fabric: Michael Miller Cotton Couture solids
Pattern: Log cabin
Quilting: Figure eight loops with Aurifil thread
Finished: November 2014

Wednesday, July 23, 2014

Nordic Christmas [Christmas in July]

Merry Christmas in July! This is a tutorial for a quick Christmas quilt. Seriously quick and fun. It is a Scandinavian inspired design I put together for Folk Art Holiday. This is something you can whip up quickly and enjoy all Christmas season! I just super sized this classic block for a fresh and fast Scandinavian inspired quilt.


Make sure to head over to the Sew Lux Blog to see the other fab tutorials.

As always, if you have any questions or if I made a mistake (known to happen, I am not a professional) let me know. I am happy to help and would love your input.

Nordic Christmas Tutorial

Finished Quilt Size: 65” x 65”
Finished Block Size: 25” x 25”
All seams are a scant ¼”
Skill level: Confident Beginner

Please read all of the instructions first before you start. 


Materials:
8 Fat Quarters of Folk Art Holiday (Available here)
4 yards backing fabric
½ yard for binding
Coordinating Thread (I used this)

Supplies:
Basic quilting supplies (rotary cutter and mat, ruler, scissors, sewing machine, iron, etc)
6.5” Square Bloc-Loc Ruler (optional, but helpful)
Rotating cutting mat (optional, but helpful)

For each block cut (parenthesis note the prints from my example):
6 – 6 x 6” squares white
4 – 6 x 6” squares Print B (Green)
2 – 6 x 6” squares Print C (Blue Snowflake)
8 – 5.5 x 5.5” squares white
2 – 5.5 x 5.5” squares Print A (Blue Bird)
1 – 15.5 x 5.5” rectangle Print A (Blue Bird, cut this directionally so the birds stand upright, horizontally the long way)


1.    Make twelve (5.5 x 5.5”) half square triangles (HSTs) blocks, eight of Print B and four from Print C, using your 6 x 6” squares of the print fabrics paired with white. You can use your favorite method to make these HST blocks, I outline my favorite below (using your 6 x 6” squares):

a.     Draw a diagonal line through all six of the white squares using your fabric pen or a pencil.


b.     Pair the white squares with squares of Print B and C, right sides together.


c.      Sew ¼ inch on either side of the diagonal line for each pair of squares.


d.     Cut along pencil line.


e.     Press blocks, with seam toward darker fabric (print).


f.      Trim each HST unit to 5.5 x 5.5” (Use your Bloc-loc and rotating mat to make this painless and quick).


g.     You should have twelve half square triangle units (eight from Print B and four from Print C, all paired with white).


2.    Now it is time to layout your block. It is a 5 square by 5 square block unit. Lay the block out as pictured below (time to get Print A involved).


3.    Sew together in horizontal rows. When you are finished with rows 1 through 5, press the rows in opposite directions, row 1 to the right, row 2 to the left, row 3 to the right, etc. I used a technique called webbing my block (for a tutorial on that, see this video).


4.    Sew five rows together.


5.    Repeat to make four blocks. Each block measures 25.5” square.


Corner Stone Instructions:

Cut:
Eight – 3” by approximately 15” strips of each print you would like to use (I chose two red, two gray, two blue, and two green, using the Print A from each block.)


1.     Sew strips of the blue print to the red print, then strips of gray print to green print. Make sure you check to ensure directional prints are facing the same direction.

2.     Press all of the seams to one side (up for the blue and red and down for the green and gray).

3.     Cut 3" strips from the long strips. You need nine from each fabric set.


4.     Take one from each combination and sew together so seams lock. If you want all of your cornerstones to look the same just make sure to sew them in the same orientation.


5.     You will finish with nine 5.5 x 5.5” four patch blocks.


Sashing/Layout and Assembly:

Cut: 
Twelve – 25.5 x 5.5” strips of white for the sashing.

1.     To the left of each 25.5” square block attach a sashing strip. Sew blocks together in large strips and add one more sashing strip at the end. So your block units look as pictured. Press seams towards sashing.


2.    With the remaining sashing strips attach them with the four patch corner stones in between each strip. You will have 3 long strips. Press seams towards sashing.


3.     Sew sashing onto blocks, use pins at this stage to line up seams (even if you never use pins, trust me, you'll want to here).

4.     Sew rows of blocks together to complete your quilt top (use pins, you may need to ease in some seams to your blocks line up perfectly).

5.     Press! Step back and enjoy!


Now you can baste, quilt and bind your quilt in your favorite way!

I am off to finish this one. I will make it my personal goal to have this finished to show you by the end of the Christmas in July Challenge. I can’t wait to see what you make. 

Link up your projects by between July 21st and August 4th on the Sew Lux Blog for a chance to win fabulous prizes. More importantly, get a jump on the Christmas sewing and avoid the craziness that can come with that season! 


For complete challenge details see here.

Full Disclosure: This fabric was given to me in exchange for writing this tutorial, but I love Sew Lux and I buy fabric there all of the time. My endorsement of the shop is heartfelt and my opinions are my own. 

Sunday, February 16, 2014

Orange. February.

Do you ever have one of those days/weeks/months/years where you completely overcommit yourself?


Then you freak out, run around, write lists, neglect your husband, forget to call your mom, leave your teeth unbrushed, and eat lots of chocolate?

Yes? No? Maybe? Sometimes? Yesterday?

I think I left my head in December. Perhaps my sanity was left in Tennessee when I went there in January?


When I get super crazy I need to appreciate the little things. The small victories if you will.

Today we are cerebrating the fact that I finished my Riley Blake Challenge project on time. I mean seriously, we could say it is early because it is not due until TOMORROW!

I had the idea for this quilt when I was listening to this TED talk by Chip Kidd (graphic designer). In the talk, Kidd talked about how when you are designing something you need to show but not tell or tell but not show. You shouldn't do both. Then he sort of offhandedly brought up that it might be interesting to show and tell different things.


I have been thinking about this idea for months. I knew I needed to make it into a quilt.

When I got my Riley Blake Challenge fabrics at the Triangle Modern Quilt Guild meeting I fell in love with the orange fabric. I knew I needed to show orange and the opposite of orange is blue. The paper cranes are just pretty. I did not use all of the fabrics, I knew I had to trust my gut and follow  my inspiration.... It is not that I did not love the fabrics sent to us from Riley Blake. It is just that sometimes it is about what is not included. Less can occasionally be more.

The pattern for the cranes is here from Kitten's Mittens and I got the text pattern here from Quiet Play.

Then I decided to use all of my thread to quilt this one with super close together organic lines. It took an entire day. I totally had time for that. I also totally had time to make this wall hanging. I totally do not have a wall available to hang this on. Strong work.

Now back to the list. Maybe someday I will even blog about something else besides a finish, I miss this blog.

I love you all. I miss you.

Quilt Stats:
Name: Orange
Size: 40 x 40"
Fabrics: Assorted Kona solids and Riley Blake basics, background is Kona Snow
Quilting: Organic matchstick lines with Aurifil white thread
Finished: February 2014

Tuesday, February 4, 2014

Pink Chowder during a Cold Dark Winter

Sometimes quilts are born, not designed. It just seems like they spring out of your head fully formed.


This quilt was born when in a fit of indecision I pulled fabrics from my shelves to take to a retreat with my SURMA sisters (incidentally, this is the fabric pull that inspired the Ladies Night Bundle). I knew I would probably want to start sometime new on the retreat (because that is how I roll), but I had no idea what I would do.

Then we got to the mountains and I met the Accuquilt for the first time. You see my friend Lee (May Chappell) is an Accuquilt all-star and she had just received these new clamshell dies. I had never sewn a single curve, so naturally I decided I was going to use my fabric stack for an 8" clamshell quilt. As you do. As an aside, I now want all dies… I may or may not have a hexagon quilt in the works.


I got to cutting. Because the Accuquilt is amazing, I got this whole quilt cut in a morning.

Full disclosure here, because we are all friends, at that time I had never seen (or did not remember seeing) Latifah's clam famous Glam Clam quilt. I did not have her awesome directions or her videos to watch (but honestly, they are awesome you should check them out). Lee helped me out and we read some stuff from our phones, then we made it work. I had no idea how many clams I even needed… I just started sewing them together when it looked like I had cut enough.


One last awesome thing about this quilt, is that my friends donated little bits of fabric to be made into clams (when I realized my stack was not big enough). Every time I look at this quilt I see bit of some of my favorite people. Thanks Xandi, Chrissy, Lee, and Holli! I love having you here to snuggle with me.

Okay, I am obsessed. There is no such thing as too many pictures, right?


These organic super close together straight lines seemed essential for this quilt, totally inspired by the original Glam Clam.


I think this is my favorite quilt I have ever made. I look at it and I am so proud of my curves and I used some of my most hoarded fabrics.


Thanks for letting my ramble on. This quilt remains in my possession and will, probably, forever.

Quilt Stats:
Name: Pink Chowder
Size: Approximately 72"x72" (Can't measure right now, I have a cat on my lap)
Fabric: So many fabrics, there is really a little bit of everything here, from Bonnie and Camille to Lizzy House, Waterfront Park, Collage, Riley Blake, Comma, Quilters linen from Moda, Mama Said Sew, I think the cats are Kokka. If you see something I did not mention and you need to know, message me and and I will look it up. Binding is from Botanics by Carolyn Friedlander and backing is also from that line and Ikea.
Quilting: Organic matchsticks (can that be a thing?) with Aurifil Thread
Finished: January 2014

Sunday, December 29, 2013

and then fade to black

I have a confession to make right now.


I am a Carolyn Friedlander fan girl. If she touches it, I will probably like it.


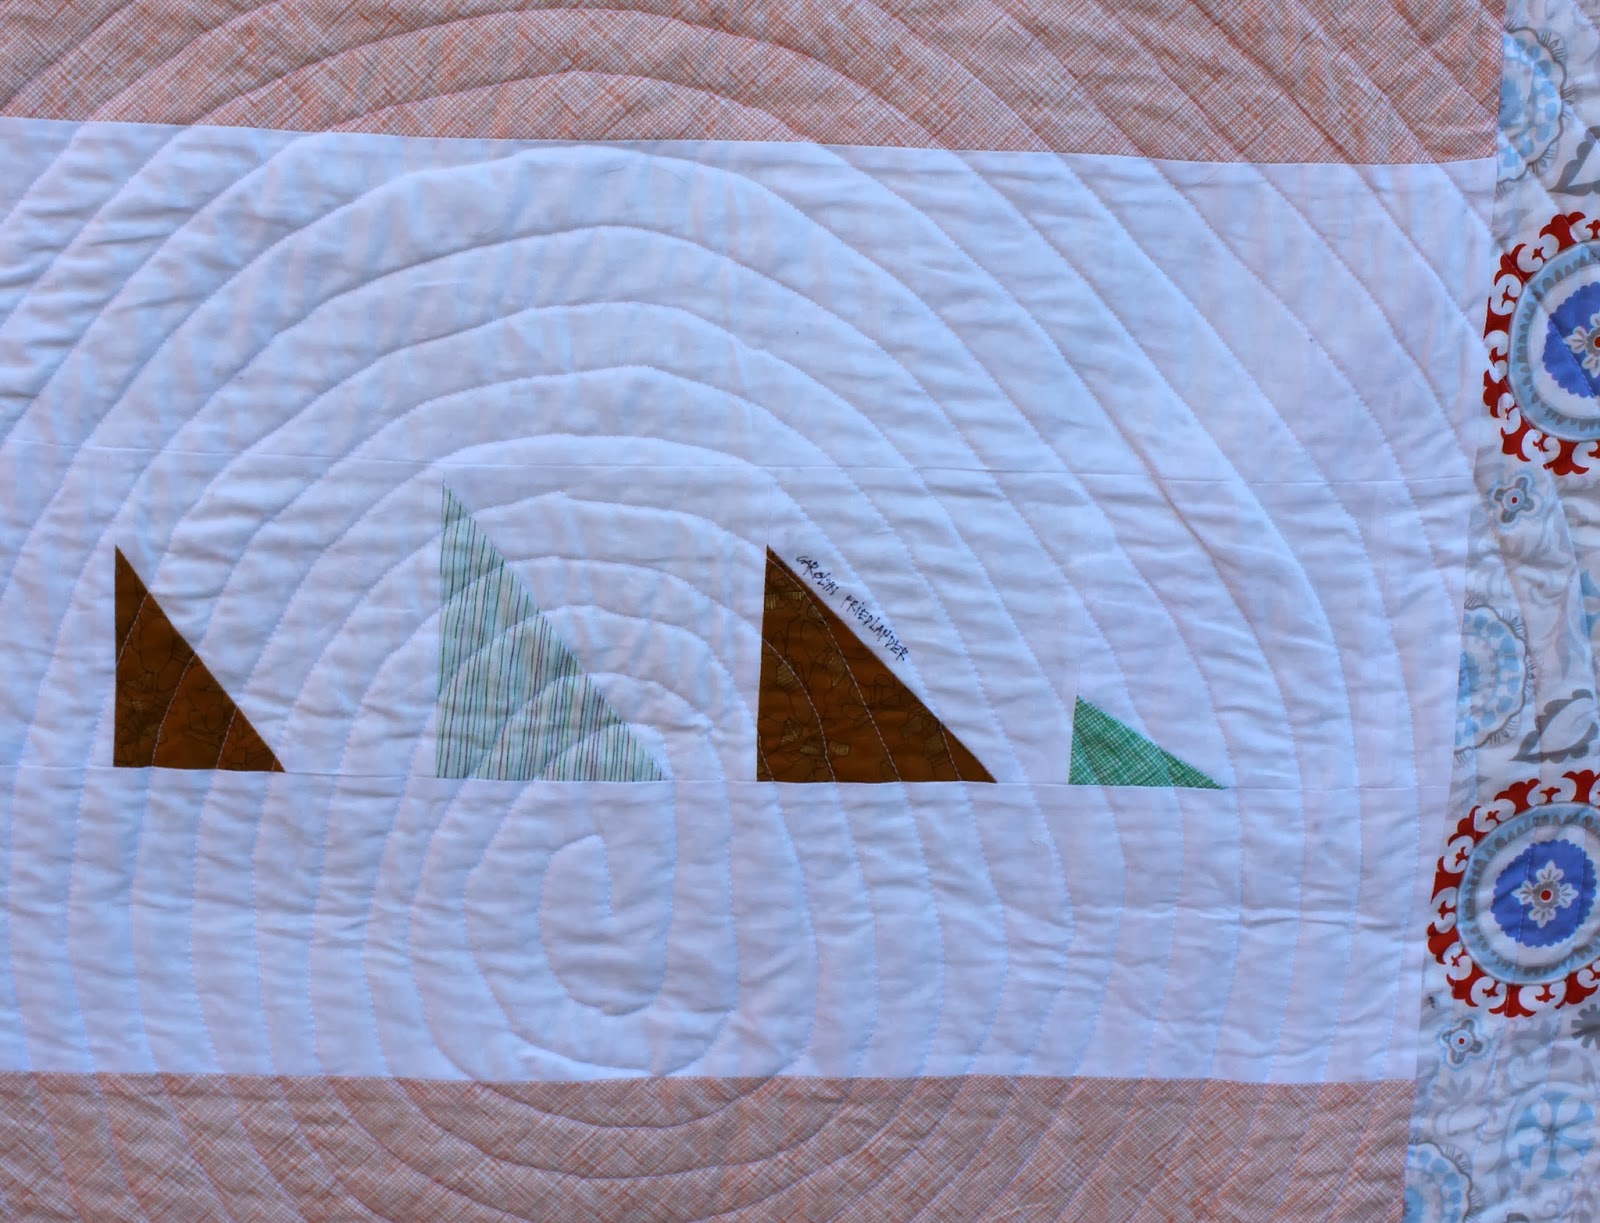
She is super sweet and awesome (I met her this fall). I sort of wish we were friends. I even got her to sign a block for the back of my Botanics quilt.


When buzz about her new line Botanics started making its way around the inter webs I knew I would like it. Some people call this a line of "blenders" but I sort of hate that term. I see this as a line of dynamic prints with great hue saturation (probably not saying that right).


This is the kind of fabric line that makes my life easy. I like to work with colors, I am not necessarily attracted to prints in my quilting. I tend to buy fancy multi-colored prints and then never use them. These single color prints are the types of fabrics I will use.

Also there are metallics and I like shiny things. This is metallics done right y'all.


I bought a charm pack of Botanics from someone on Instagram (check me out @stitchingandbaon) right after quilt market. As soon as I spread out the charms I saw the saturation spectrum and my orderly instincts felt the need to sort! Sort all of the things!

So I went from there, working with what I had…. which happened to include a couple of charm packs of Bella bleached white.


Then I added the negative space and here we are.


I heart you Carolyn Friedlander. Keep doing what you are doing. That is all.


I stamped my label onto the back of this quilt before quilting. This means I did not have to hand stitch a label anywhere. What do you think of this? Keep it going? Crazy sauce? Ambivalence?


Love you friends! Hope you had a Merry Christmas and are ready for an epic New Year.

Quilt Stats:
Name: Fade to Black
Size: 58" x 68"
Fabrics: All of the Botanics line, made by Robert Kaufman and designed by Carolyn Friendlander, Moda Solids Bleached White, and some Kate Spain (couldn't tell you the line name)
Pattern: My own (using the stitch and flip triangle technique)
Finished: December 2013
Quilting: Spiral from the center using Aurifil thread

Monday, August 19, 2013

Club Medallion: A Very Special Monday Announcement

Hi Friends!

I am just dropping in to let you know that my friends Chrissy and Linda of Sew Lux Fabrics are starting a medallion block of the month. 

It is just like a regular block of the month, except instead of a block every month you will make a border. Then at the end you have a gorgeous 62" x 62" quilt. Finished. No sashing, just a whole quilt.

It will look something like this, only with color (or no color, tickles your fancy). 


For this border of the month club, you can subscribe to just the pattern (for a special price until October 1) or you can pick a kit. If you are just a pattern subscriber you get a fresh set of directions emailed to you each month.

When you order a kit, you get all of the fabrics you need for each border mailed to you along with directions every month. I mean, seriously, it is built in happy mail. Also, knowing Chrissy and Linda (as I do), they will totally be giving you some fat cuts (if you know what I mean, wink, wink) and you will have some yummy scraps every month. 

There are two kits options. 

You might ask, "Sarah, why are you, Stitching and Bacon, so excited?" 

I will tell you. 

Chrissy asked me to curate a medallion's worth of quilt fabrics. ME!

Meet the Hipster Edition for Club Medallion. 


I was going for a cool color vibe. You know, hip.

This quilt is a complete mix of fabric lines, new and old. I had SOOOO much fun putting it together. I am really, really loving navy and yellow right now. I am pretty smitten with the faux woodgrain print from S'more Love. You have to see them and you will know what I mean.

Chrissy picked the gorgeous fabrics for the Prepster Edition.


It is so cheerful and fun. Look at those dots! What is that I spot, a faux woodgrain? Such a sunshine-y quilt.

Can't you just see this on your couch?

The details for the club are all on the Sew Lux website or in this blog post. It is six months long starting in October and running through March.

The best part is, we are all going to do it together. I can't wait to see everyone's work. I love the sense of community that we get from sewing together.

I will be posting my medallion business up here every month. Will you join me?

Saturday, May 11, 2013

Winner! Winner!


The winner of my very first giveaway is Tamie, my neighbor down in South Carolina!! Tamie, I have sent you an email to get your address. This lovely package should be in the mail by Monday. 


Thanks for playing! I hope some of you new visitors stop by again. Happy giveaway day! I am so sorry I have not replied to everyone's comments. It is seriously on my to do list. I am just getting a little overwhelmed by day-to-day life. I promise I read each and every one.