As I write this, I am sitting on a bumpy plane. I am jetting
off to Oklahoma to celebrate my Grandmother’s 85th birthday. My
Grandmother is an amazing person (I am sure your grandmother is too). This lady
grew up in the middle of nowhere, rode a horse to elementary school and then
boarded in town for high school. She
mothered five boys and one girl, who are six of the best Uncles, Aunt, and Dad
a girl could ask for (Hi Aunt Barbara!). She has made to every grandchild’s
wedding so far to be the best cheerleader ever, also, in the case of my
wedding, help make some amazing pies. It has been getting harder for her to
travel, so this weekend we travel to her. It is her turn to get celebrated and
it is going to be a shindig! This woman has over 20 grandchildren and I have
lost count of the great-grandchildren. I cannot wait. Rest assured that I made
her a snuggly lap quilt for her armchair. I can’t wait to show you pictures.

Now that I have blathered on about one of my favorite people
and inspiration, I am going to show you an unrelated finish.
Drumroll please….
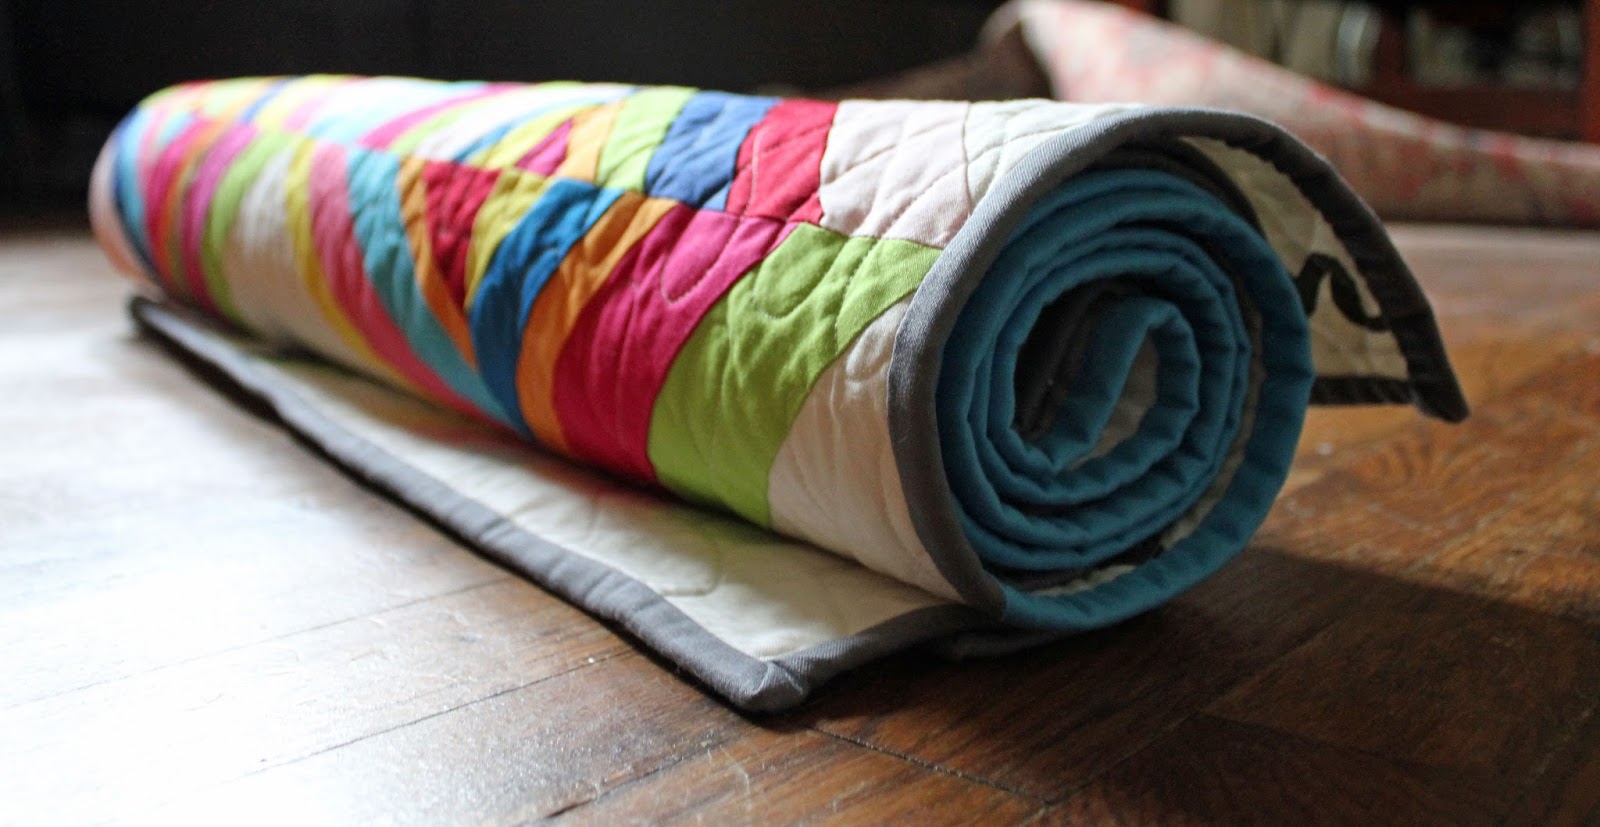
My Tangelo!

Some of you (maybe all of you) may know, I am a huge fan of
Carolyn Friedlander. She is an amazing
fabric and pattern designer and just one of the best people a girl could hope
to know. Her patterns inspire me to combine color and texture. They make my
heart sing in their striking, complex simplicity (it is a thing).
I have made it a personal resolution recently to make quilts
for me and to try hard things. Now, when I say quilts for me… I do not actually
mean I am going to keep them all, I mean when I quilt, I want to express myself
just a little, even if it is for someone else. It is the way this is fun for
me.
The Tangelo is for me. Blue is my favorite color. I love
metallic.

This was also a hard thing. It took me nearly six months
(not working constantly, but still). I worked on this quilt during two sewing
weekends with my ladies. Then, I quilted this quilt all over with custom free
motion quilting and used wool batting to make that quilting stand out. Also, it
made this quilt super substantial and comfy). I had to piece the backing with
geese, because a front this complex just needed a little something on the back.

I matched my Aurifil thread to each solid color. Yes, maybe
a little obsessive? But, I need to do what I need to do. I don’t make money at
this, we don’t need any more quilts to physically keep us warm in our home.
What I NEED is to see the picture of colors and patterns I have in my
head come alive.
Welcome to my living room Tangelo. I think I am going to
like seeing you there.

Quilt Stats:
Name: Tangelo by Carolyn Friedlander
Fabric: Whites are from Architextures and Botanics both
designed by Carolyn Friedlander for Robert Kaufman and Dear Stella Confetti
Dots. The blues are assorted Robert Kaufman Kona cottons and Moda Bella solids.
The backing is widescreen in gray by Robert Kaufman with Botanics and scraps
from the front.
Quilting: Custom straight line with my free motion quilting
foot with about six shades of Aurifil thread.
Batting: Quilters Dream Wool
Size: 68" x 72"
P.S. - I got to introduce Carolyn to my Tangelo when she came to North Carolina to teach. This was a high point.

P.S. - I got to introduce Carolyn to my Tangelo when she came to North Carolina to teach. This was a high point.
P.P.S. – The quilt is not quite straight in any of these pictures, but I must
defend my quilt holder, this quilt is large and heavy. It far exceeded his
wingspan and he is tall guy… I think I need a new photo set-up for big quilts.