Sunday, March 10, 2013

My Stars Align [The Tutorial]


Y'all. 

I am in Portland (Oregon) this week, visiting my parents. Portland is my home place! I may live in North Carolina right now, but I am a Pacific Northwesterner at heart. I grew up in this green part of the country and being here reminds me of all of those good times. 

We are skiing, eating, drinking, visiting old friends, and eating (we love food).


Anyway, I told you a long time ago I would pass on my techniques for making this little block. The quilt on my couch is still making me happy everyday. It might look hard or fussy, but trust me there are no fancy seams or funky rulers needed. I did it and I am a quilting wuss. 

Another tutorial! I am on fire. 


Stars Align Block

1/4" seams used throughout

Disclaimer: I have not seen this block floating around on the inter webs, but I am sure I did not invent it. I got inspired by those nordic sweaters and sketched out this block. Also, I am sure there are better ways to put this together, this is just how I did it. Let me know if you come up with a better method. 

For the purposes of this tutorial, I divided this block into three different components (types of blocks). There are the corner blocks, the half square triangles (HST) blocks, and lattice lines.


Supplies:

For the HST blocks-
4 - 4" x 4" squares of background fabric
4 - 4" x 4" squares of star color A
4 - 4" x 4" squares of star color B (for the stars, I tried to combine one low volume fabric with one more "noisy" fabric)

For the corner blocks- 
4 - 2.5" x 2.5" squares of background fabric
1 - Approximately 28" x 1.5" strip of the white fabric (choose a fabric that contrasts with other fabrics)

For the lattice lines-
Approximately 14.5" x 1.5" strip of white for the vertical lattice
Approximately 15.5" x 1.5 " strip of while for the horizontal lattice

Rotary cutter, ruler, scissors
Water or heat soluble marker


To make the HST block

I am going to run through this really quick, refer to this handy guide for details on making two HST out of squares of fabric. 

1. Pairs: - 2 square A's with square B's
- 2 square A's with background fabric
- 2 square B's with background fabric

2. Mark a diagonal line across one of the fabrics in each pair. 


3. Sew 1/4" on either side of the line. I chained pieced these like a boss. 


4. Cut along the line for each of the squares, magically making one square composed of two triangles. Press your seams open. 


5. Trim each HST down to 3.5" x 3.5". 


6. Now you have the blocks to make the pretty star. You could stop now and have a pretty basic HST block, but keep going and it is more special and stuff. 

To make the corner blocks

1. Line up the 2.5" x 2.5" squares of background fabric along your 28" strip of white fabric, with small gaps in between each square. Sew them all down as pictured (sorry it is blurry). You should have extra fabric for the next side of the corner. You totally do not need to strip piece these, it is just faster.


2. Press the seam open and cut the blocks apart so that each block is 2.5" wide by 3.5" tall. 


3. Line up these blocks on the remainder of the white strip and sew them down. 


4. Press open and trim. Each block should measure 3.5" x 3.5" and you will have four of them.


Bringing it all together

1. I like to layout all do my block so I know what goes where. Like this, you have 16 blocks.


2. Sew together pairs of blocks. Time to buddy up. I totally used pins at this point. You want your seams to line up. Press seams open. You should now have eight blocks.


3. Buddy up again, bring the pairs together, again, use pins to make sure your seams line up. Press seams open. Now there are four blocks.


4. Using your 14.5" x 1.5" white strip sew the upper and lower sets of blocks together, separated by the white strips to complete the vertical lattice. Trim the block and press the seams open. 


5. Sew the upper and lower halves together separated by your 15.5 " x 1.5" strip. Make sure you line up the vertical seams above and below the white strips and use pins. Press your seams open and trim the edges of the strips. 


Block complete. It should measure 13.5" x 13.5"


If you make this share it with me! Please! I want to see. 

xoxo 
Sarah

Wednesday, March 6, 2013

Wonky Diamonds [Tutorial and Work in Progress]

I  am home from Savannah! Home again! Home again!

Also, on Saturday, I am going to Portland to visit my parents. Yay! I have not been home in 2 years and I have not lived in Oregon since I was 18 (ten years!). If anyone reading this lives in Portland, OR, and wants to pass on recommendations for your favorite bars, restaurants and fabric stores, that would really make me smile.

I got a bit of sewing done while I was in Savannah, honestly, there was not much else to do in the evenings. Some of my projects are secret and some of them are just not photographed yet. Today I want to write out the tutorial I finished while I was in Savannah.

It is my first tutorial (ever), so do not be too hard on me if I made a mistake. I am trying to learn, so let me know and I will fix it. If you have a question, send me a little note in the comments and I will get right back to you.

I put this together for my Simply Solids Bee [Gamboge Group]. This is going to be your April block; fabric will be on its way in March sometime. Each block will be unique and bright. I am so excited about this bright, happy quilt and to putting it together with everyone's blocks.


I am calling this block "wonky diamond." 

It is inspired by so many fabulous people and quilts. The colors really remind me of old school improvisational quilts like this Gee's Bend quilt. Denyse Schmidt's Crazy Star quilt from her Modern Quilts, Traditional Inspiration book really got me started with the wonky angles. Then I made a baby version of that, and I have not quite gotten those blocks out of my system.

My technique was inspired by this terrific string block tutorial from Ashley at Film in the Fridge.  Karen from Blooming Poppies has another tutorial where she explains how to do this as a half square triangle with a muslin base. My block is just a slight variation building on the work of these lovely ladies (and I am sure a ton of uncredited people out there). Thanks!

Also, I love rainbows. So, the colors make me happy. Btw, the pictures are terrible... It is so dark at night, I am trying to work on that, but for now I am sorry.


Materials: 
- Strips of varying lengths and widths. (I used rainbow solids, but I elected to make it totally random)
- 2 9" x 9" squares of background fabric (I used white, but anything goes)
- Four sheets of scrap paper cut to 8" x 8"
- Ruler, rotary cutter, scissors, cutting mat
- Glue stick
- Pencil

(1/4" inch seams, I reduce my stitch length to 1 for the paper piecing)

1. Use your ruler and pencil to draw a straight line from corner to corner on your 8" x 8" paper squares. 


2. Cut your background 9" x 9" fabric squares from corner to corner to make 4 half square triangles. 

3. Using a few dabs of glue, stick a white triangle to the side of the paper you did not draw the line on (see picture), make sure it covers half of the paper and goes over all of the edges, including the center line by at least 1/4". 


4. Pick your first strip. Just make sure it is long enough to cover the length of the diagonal. Place the strip on the diagonal. It does not matter too much if the strip is exactly parallel to the white side. 


5. Flip your paper over and sew along the pencil line you drew on the paper. This makes a perfect line between the white and colored side of the block. Flip the colored fabric over and press it using a hot, dry iron. Trim the excess colored fabric on the end, leaving a little overhanging to trim at the end. Also, trim the stitched line down to about 1/4" away from the seam. Save the scraps, you might be able to use them later.


6. Pick your next colored strip and place it over the first strip. Now, this is where we get wonky. Do not line up your two strips, place the next strip at an odd angle and at a narrow or wide distance. There are no rules. Sew the strip down, 1/4" from the edge of the new strips edge.


7. Use scissors to trim the excess down to 1/4", press the strip over, and then trim the ends.


8. Continue to sew down strip until the paper is covered. Keep using crazy angles and irregular distances. I like to make sure I have 5-6 strips in each rainbow half. It should look something like the second picture from the back.


9. After the paper is covered with strips, use your rotary cutter and ruler to trim the block to the size of the paper. I like to give it one more pressing with a hot iron at this point. It should look something like this.


10. Carefully remove the paper. Then press the block again (you can use steam now). Be careful not to stretch the fabric.


11. Make three more blocks the same way for a total of four blocks (Steps 3 through 10).

12. Line up two of the blocks, colored sides together to form half of the diamond, careful to match the corners. Sew the two blocks together. I actually used pins for this part to make sure my corners lined up. Do this with the other two blocks as well. Press seams open.


13. Sew both of the block pairs together to make the completed diamond, being sure to line up the center seam and edges. Press with heat and steam to flatten the bulky seams.


The finished block should measure 14.5"x14.5"

This is a work in progress right? A lovely bee quilt! Linking up to the fun.

WIP Wednesday at Freshly Pieced

Tuesday, February 19, 2013

Hello from Savannah.

Hi friends.

I am in Savannah. I do not have internet.


I am watching a show called "The United States of Bacon." I can't eat bacon. I am allergic. I love bacon.

I had to go to someone else's apartment to write you this little note.

Mostly, I am just writing this email to you to say hi.

Hi.


I have a tutorial to share. Unfortunately, I agreed to write a book review for an archaeology journal, now I have to read the book. That means, time I can't sew or write tutorials.

Do not worry, I brought my sewing machine to Savannah. I am sewing. A tiny bit.  I made an adorable little lap top case. Mostly, I am sewing secret things for my secret sister partner these [secret] projects make me so happy. I will show them to you after my partner sees them.

I promise to be back soon. I will finish the tutorial. I will take photos.

In this post I give you bee blocks I have finished and sent away.


Meanwhile, I will be out working in a garbage filled roadside. I mention this least you think my job is glamourous. This is why I am allergic to bacon. Le sigh.


This is a teaser for the tutorial I am going to share. Rainbows!

Tuesday, February 5, 2013

The Stars Aligned and I Finished a Quilt!

Once upon a time, I got a little tipsy and told an acquaintance that I thought we should be better friends. To be fair, she was (is) super cool. She thought I was crazy. Fast forward one year, we are awesome friends. I am goal oriented.

This dear friend paints Ukrainian eggs.

I saw one of her eggs and decided it was full of quilty inspiration.


We decided we would each make a project inspired by the others craft.

I made this quilt.


Do you see it?


I named this quilt, "Stars Align." It feels sort of Scandinavian to me. What do you think? Sort of inspired by the egg, it echoes the egg. Then there is a whole secondary pattern I hadn't seen until it came together. I didn't realize how much the lattice pattern would catch the eye. 

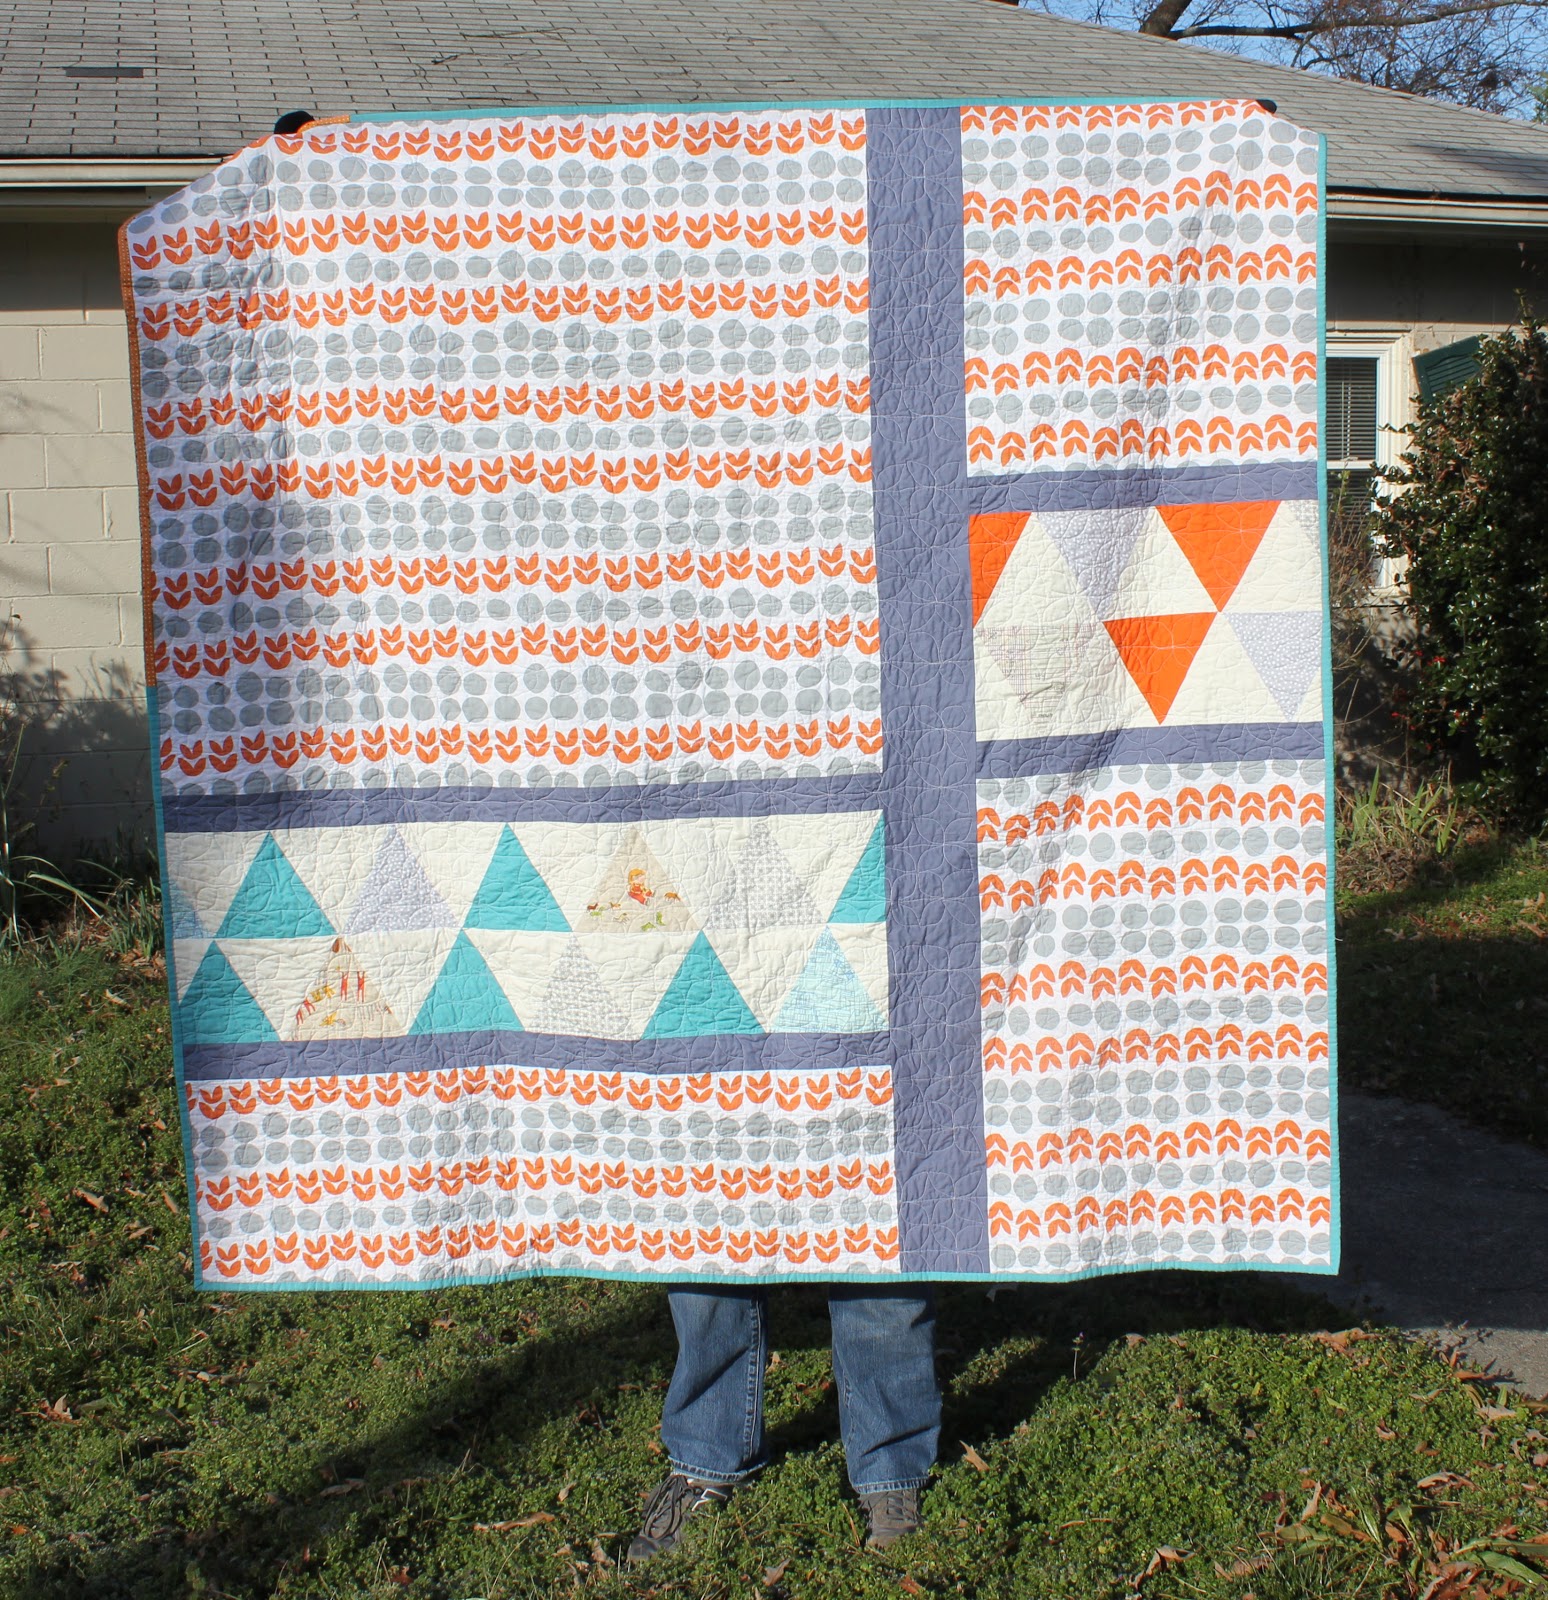
I love the back almost as much as the front. 


The back is a Lotta Jansdotter print from the Bella collection. It makes me so happy.


I quilted it with Elizabeth Hartman's Dogwood pattern. It was pretty hard for me because I am not exactly a pro at free motion quilting. This quilt might not win any awards... But, I love it.

See how I worked some Heather Ross in there? I used a bunch of my favorite fabrics in this quilt, because I am keeping it and I wanted to see things I love each time I cuddle under this quilt. The front is a combination of Architextures and a variety of other prints from my stash. I pretty much put some Heather Ross on everything I love.


Does anyone else have a cat that loves it when you take quilty pictures? He loves it when quilts go on the ground.


Also, this block design is all mine! I mean, it is not super creative, but it came from my head. I am putting together a little tutorial for how I did this to come online soon. 

Because I know you are dying to know, here is a picture of the quilt-y egg my friend painted (dyed?) me. 


Name: Stars Align
Size: 65"x65"
Fabrics: Kona Snow and Steel, Bella in New Turquoise (?), Lana Jansdotter's Bella for the back, and the rest are stash fabrics that I am not sure I could name if I wanted to... 
Binding: Bella Solid New Turquoise
Pattern: My own!
Finished: February 2013